
How to Install & Replace Bushings
.png?width=1100&height=220&name=Application%20Note%20Banner%20(2).png)
![DOWNLOAD TN260914 [PDF]](https://no-cache.hubspot.com/cta/default/9494162/f8a7d81d-76a6-42cb-ae72-09b0117a212f.png)
This technical note is an overview of ORCA motor's low friction motor bushings, with information on how to identify and replace bushings when applicable.
Overview
ORCA motors are fully-integrated, with their drivers, controllers, and logic sealed in epoxy-potted stators. The only mechanical contact that between the stator and the shaft of an ORCA motor occurs at the bushings, which are installed at either end of the stator. Unlike ball screws and other conventional linear motion technologies, ORCA motors generate force though direct magnetic interaction, eliminating the need for mechanical transmission components between the stator and shaft.
Because ORCA motors can inherently sense force between the shaft and stator, minimizing friction at this interface is important for smooth motion and accurate force control. Excessive bushing friction can appear as additional force on the motor which can reduce performance, particularly in applications requiring precise force measurement or low-force motion.
In 2026, Iris Dynamics introduced a custom low-friction bushing material for ORCA motors. This new bushing is designed to reduce friction between the shaft and stator while also improving bushing life, particularly in demanding operating environments.
Definitions
Stator: The stationary motor assembly containing the electromagnetic components used to generate force. The shaft passes through the center of the stator and is supported by bushings installed at either end.
Shaft: The moving cylindrical component of the ORCA motor. The shaft is produced from polished stainless steel.
Bushing: A low-friction bearing surface installed at each end of the stator. The bushings support and guide the shaft while maintaining alignment between the shaft and the stator.
How to Identify a J Bushing and a G Bushing
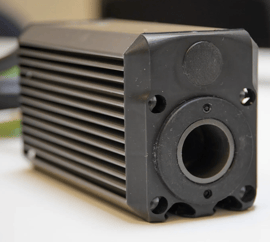
ORCA motors may container either G bushings or the newer J bushings. J bushings are black, whereas the older G bushings are a dark, speckled grey.
 |
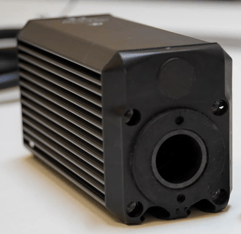 |
| Example of G Bushings | Example of newer J Bushings |
When identifying a bushing, do not rely solely on the motor model or external stator appearance. Confirm the installed bushing type using color.
How to Replace the Bushings
 When replacing the bushings, take care around the shaft: ferrous tools will be attracted to it and may cause damage.
 The high field strength of the shaft will cause it to stick to other shafts and ferrous components. Be aware of pinching hazards and the risk of equipment damage.
Bushings are replaceable components and can be services without replacing the complete stator assembly. Before replacing a bushing, inspect the shaft and bushing for signs of abnormal wear, contamination, scoring, or damage. A damaged or contaminated shaft can cause premature wear of a replacement bushing.
The procedure for replacing the bushings of an ORCA motor depends on the installation location. This section provides general guidance only.
1. Remove any shaft collars or mechanisms that may restrict the removal of the shaft from the stator. Withdraw the shaft and use a rod or pliers to remove the existing bushing.
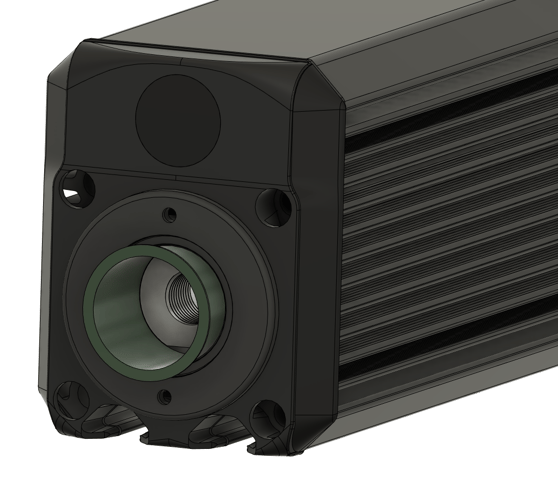 Figure 2: Bushing Removal/Replacement
2. Press-fit the replacement bushing into the bore. Ensure that the bushing is fully seated.
3. Repeat the process for the bushing at the opposite end of the stator.
After installation, verify that the shaft moves smoothly through the stator and that there is no unexpected binding or excessive friction throughout the required stroke.
When to Use a Bushing Retainer
A bushing retainer is used when the standard method of bushing installation does not provide sufficient mechanical retention for the motor configuration or operating conditions. Bushing retainers are recommended in particularly dirty environments or when the stator will experience temperatures above 80°C. This temperature can be monitored using the motor's coil-temperature reading.
Bushing retainers can be made from any non-conductive material, or they may be purchased directly from Iris Dynamics. The installation of an Iris Dynamics bushing retainer is shown below.
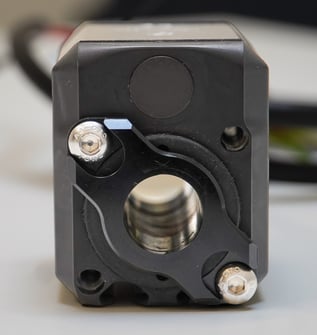
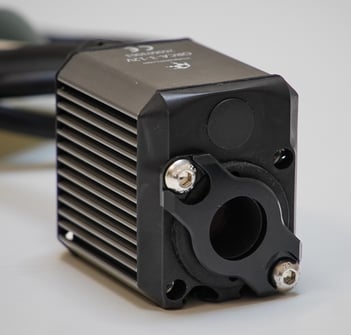
Figure 3: Bushing Retainer Installation
When to Use Lubrication
Both G and J bushings have solid lubricants integrated into the material. Neither Iris Dynamics nor the bushing manufacturer recommends initially applying additional lubrication to the bushings.
However, mineral-oil-based lubricants containing metal soap additives may be used to further reduce sliding friction and stiction caused by side loads. Lubriplate 630-AA is frequently used with Iris Dynamics products. Due to the exposed nature of ORCA motor shafts, environmental particles can adhere to the lubricant, causing friction performance to drift over time. Frequent reapplication or shaft protection may be necessary in dirty environments.